WaterObject Manual
Water Object
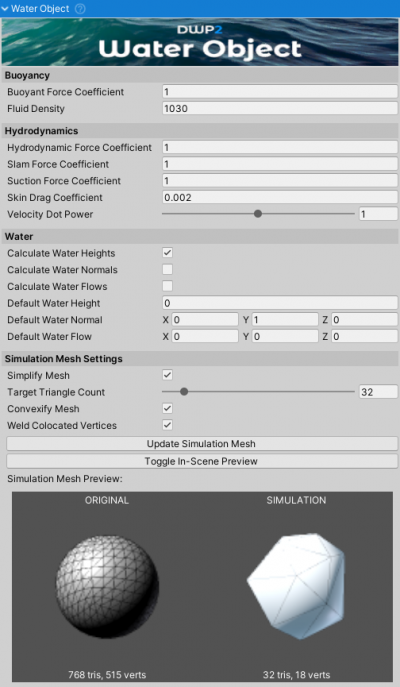
WaterObject is the main script of DWP2. It handles all the buoyancy and hydrodynamics calculations.
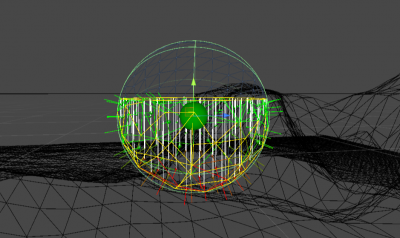
WaterObject gets the data needed for simulation from the Simulation Mesh. This is a static mesh that will be used for simulating water/object interaction and can either be the original mesh or a simplified version of it. WaterObject provides basic tools for mesh triangle decimation, removal of co-located vertices, and convexification - if needed.
Tips
- When using hollow boat/ship hulls it is recommended to use the ``Convex`` option when generating the simplified mesh.
WaterObjectdensity should be above ~15kg/m. Large volume, extremely low mass objects can cause the object to jump/fly away when falling into the water.
Fields
To get info about individual fields hover the mouse over the field and a tooltip will pop up.
Instantiating at Run-time
Check WaterObjectManager page for more info about instantiating WaterObjects at run-time.
Water Particle System
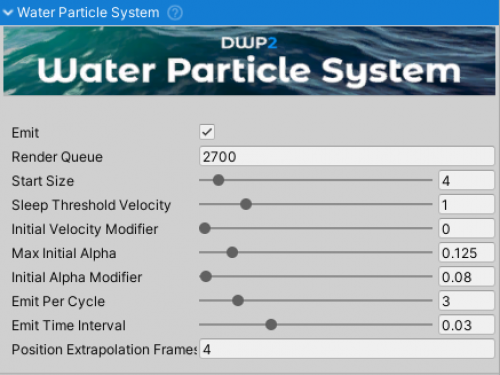
Water Particle System is a component that generates particles based on simulation data from Water Object Manager. It can be added to any Water Object.
Water Particle System has been rewritten from the ground up for DWP2 and now it has virtually no performance or memory overhead except for the cost of the Unity’s Particle System it uses to render particles.
Water Particle Systems emits only along X-Z axis and does not work with wavy water assets. For that asset-specific foam has to be used (if available).
Fields
Emit- Particles will only be generated when this field is ticked.Render Queue- Render queue of the particle material. If particles are rendered behind the water increase the value to be just above the value of the water’s render queue.Surface Elevation- Height above water surface at which the particles will be emitted.Start Size- Starting diameter of the particle.Sleep Threshold Velocity- If rigidbody’s velocity is below this value particles will not be emitted. Do not set to 0 as that will result in (invisible) particles constantly being generated, even when object is still.Initial Velocity Modifier- Velocity at the point of contact with water is multiplied by this value to get the initial particle velocity. If set too high it will seem as if the particles are flying away from the object.Max Initial Alpha- Maximum initial alpha (transparency) of the foam. If set to 1 foam will be opaque, 0 and it will be invisible.Initial Alpha Modifier- Higher contact force with water will result in higher initial alpha (up to Max Initial Alpha). This field sets the sensitivity of alpha related to the force.Emit Per Cycle- How many particles should be emitted in each cycle? If there are not enough contact points with water less particles may be emitted.Emit Time Interval- Interval between emission cycles in seconds.Position Extrapolation Frames- To counteract the initial fade-in and apparent lag of the particles, the emission position is predicted a number of frames in advance. If this number is set too high particles will appear as if emitting in front of the object
Supported Water Assets
WaterDataProvider scripts are interfaces between the 3rd party water assets and Dynamic Water Physics 2. They tell the WaterObject where the water is.
! Assembly Definitions !
Due to inclusion of assembly definitions into this asset with v2.4 an additional step is required when setting up 3rd party water assets. The asset either needs to be referenced inside NWH.DWP2.asmdef or all the .asmdef (assembly definition) files need to be removed from DWP2. If the 3rd party asset does not include an assembly definition file one should be added manually to the root of that asset, or the .asmdef files need to be removed from DWP2.
If removing .asmdef files make sure to tick Project Settings > Player > Allow 'unsafe' code. This code will not harm your device, it just allows unmanaged memory access (i.e. pointers) which are used for performance optimization inside DWP2.
Steps to reference a 3rd party asset inside Dynamic Water Physics 2:
- Open the folder containing the asset (e.g. Crest) and check if there is an .asmdef file there. Sometimes this file can be inside a Scripts or similar folder. If the file is missing create one by Right Click > Assembly Definition. Name the file the same as the asset, e.g.
Crest. - Go to NWH/Dynamic Water Physics 2 and click on NWH.DWP2.asmdef file. Under Assembly Definition References click on + to add a new element to the list. Set the new element to the newly created .asmdef file, e.g. Crest.asmdef.
- Done. Now DWP2 will know about the 3rd party water asset and will be able to access the code from that assembly.
Flat Water Data Provider
FlatWaterDataProvider can be used for all flat water systems.
It can even be used with wavy water systems if the waves have 0 amplitude to improve performance (sometimes drastically as the water heights are always queried with wavy water system, even if there are no waves).
Setup
- Attach
FlatWaterDataProviderto theGameObjectrepresenting the water. WaterObjects will now float at the watertransform.yposition.
Crest Water Data Provider
Dynamic Water Physics 2 is compatible with Crest v10 or newer. Older versions have different API.
Crest supports water heights, normals and flows.
Crest Import
- Download and import Crest and Crest-Examples from here. For HDRP and URP version check Unity Asset Store.
- Open Crest-Examples ⇒ Main ⇒ Scenes ⇒ main scene.
- Remove the existing boat from the scene.
Adding a CrestWaterDataProvider
- Add
DWP_CRESTandDWP_CREST_5(only if using Crest 5) to Project Settings > Player > Scripting Define Symbols. - Find the
GameObjectcontaining theCrestWaterRenderer(Crest 5) orOceanRenderer(older versions) component. - Attach
CrestWaterDataProviderto the object.
Adding a WaterObject
- Drag
Racerprefab into the scene. - Press play. The boat will now float and follow the waves properly. If this is not the case check that the console states
DWP: Using Crestand there are no errors or warnings.
LUX Water Data Provider
Setup
- Add
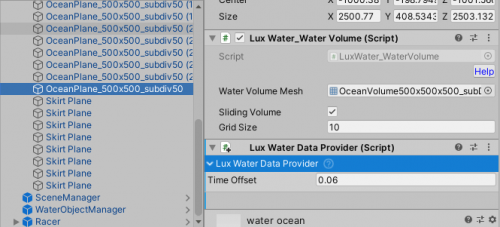
DWP_LUXto Project Settings > Player > Scripting Define Symbols. - Attach
WaterDataProvidertoLuxWater_WaterVolume.
RAM Water Data Provider
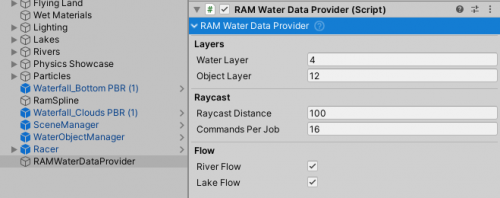
RAMWaterDataProvider supports water heights, normals and flow and it inherits from RaycastWaterDataProvider.
Setup
- Add
DWP_RAMto Project Settings > Player > Scripting Define Symbols.
- Set up the scene as if using flat water, minus FlatWaterDataProvider.
- Add RAMWaterDataProvider to the scene. It does not have to be attached to any specific object.
- Make sure that the RAM object has a MeshCollider attached. This is required for Raycasts to work.
- Assign Water Layer to the River Auto Material water. Assign Object Layer to all the WaterObjects in the scene. This is an important step as the script will disable physical collisions between the two layers to prevent the WaterObjects from sitting on top of the mesh collider that R.A.M. uses instead of interacting with water.
- R.A.M. setup is ready to go.
Ceto Water Data Provider
Setup
- Add
DWP_CETOto Project Settings > Player > Scripting Define Symbols. - Attach
WaterDataProvidertoOcean.
Ocean Next Gen Water Data Provider
Ocean Next Gen is supported but has not been updated regularly for over two years. Crest and Ceto will be better options.
Setup
- Add
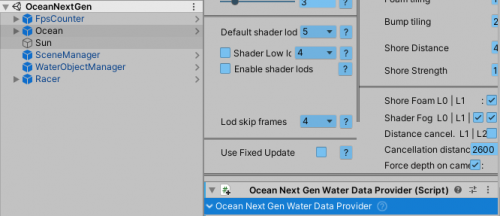
DWP_OCEAN_NEXT_GENto Project Settings > Player > Scripting Define Symbols. - Attach
OceanNextGenWaterDataProvidertoOcean.
SUIMONO Water Data Provider
Setup
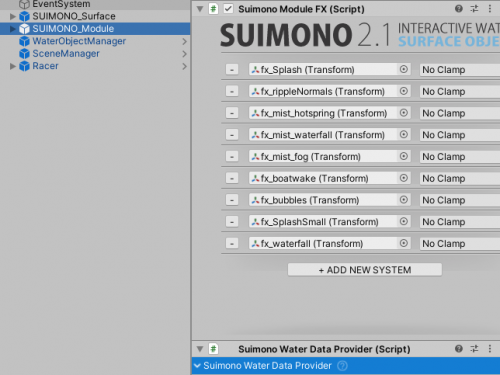
- Add
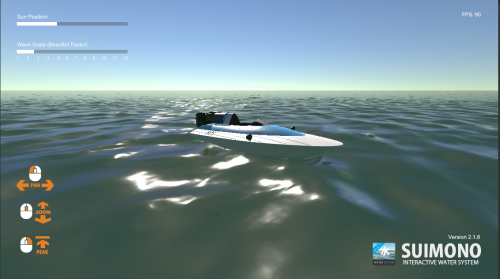
DWP_SUIMONOto Project Settings > Player > Scripting Define Symbols. - Rename SuimonoWaterDataProvider.cs.txt to SuimonoWaterDataProvider.cs.
- Add
SuimonoWaterDataProviderto the object containingSuimonoModulescript.
Stylized Water Data Provider
Setup
Unlike other WaterDataProviders, the one for Stylized Water 2 is included with the Stylized Water 2 asset instead of DWP2.
- Set up the scene as per quick start guide for flat water, minus FlatWaterDataProvider.
- Go to Help → Stylized Water 2, and click the “Install integration” button. Wait until scripts have finished compiling.
- Add
StylizedWaterDataProviderto the object containing OceanRenderer script.
KWS Water Data Provider
Setup
- Update the KWS Water first as there was an API change recently.
- Add
KWS_asmdeftoNWH.DWP2assembly definition references. - Add
DWP_KWSorDWP_KWS_HDRP(depending on version used) toScripting Define Symbolsunder Project Settings ⇒ Player ⇒ OtherSettings. - Attach
KWS Water Data Providerto the GameObject containingWater System(this game object is named Water in KWS demos).
Multiple Assets / Water Types
Multiple water types can be used in the same scene at the same time. This is achieved through triggers (Colliders with isTrigger set to true) attached to the same GameObject as the WaterDataProvider in question.
By default these colliders are created automatically on Awake and are set to cover the whole world. However, it is possible to use a WaterDataProvider just for a small part of the scene - such as a lake.
- Attach a
Colliderof any type (e.g.SphereCollider) to theGameObjectcontainingWaterDataProvider. - Tick
Is Triggeron the collider. - Adjust the size/radius of the collider to cover the area you want the
WaterDataProviderto have the effect on.
If there are multiple trigger volumes they will act as a queue, meaning the one that the object last entered will be currently active.
Helper Scripts
Mass From Volume
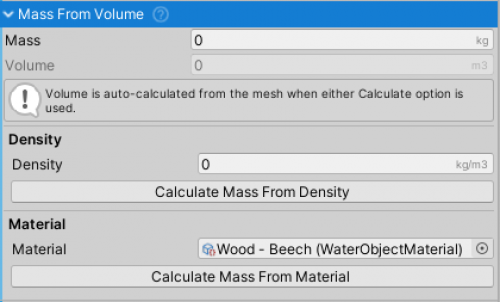
MassFromVolume is a helper script that calculates object's mass from volume of the mesh and the density.
- Volume of the mesh is calculated automatically.
Massfield can also be set manually.- Can be used together with
MassFromChildrento calculate mass of complex objects (objects having more than one childWaterObject).
Mass From Children
A helper script for determining mass of a Rigidbody from the children. It sums the masses of all the children that have WaterObjectMassHelper scripts attached. This eliminates the need for guessing the mass of the object.
Usage
- Attach the script to the parent object. That object has to contain the
Rigidbodycomponent. - Make sure that at least one child has
WaterObjectMassHelperattached or the result will be 0 and ignored. - Press Calculate Mass From Children. This will calculate and set the
Rigidbody's mass.
